
| Отапливаемая площадь(м2)*: | |
| Подводка(м): (расстояние от коллектора до границы отапливаемой площади) |
|
| Количество контуров(шт): | |
| Труба: (бренд, диаметр, толщина стенки) |
Valtec 16×2,0 Valtec 20×2,0 Rehau Rautherm S 14×1,5 Rehau Rautherm S 17×2,0 Rehau Rautherm S 20×2,0 Rehau Rautitan pink 16×2,2 Rehau Rautitan pink 20×2,8 Rehau Rautitan stabil 16,2×2,6 Rehau Rautitan stabil 20×2,9 Rehau Rautitan flex 16×2,2 Rehau Rautitan flex 20×2,8 |
| Шаг трубы(см): | 10 см 15 см 18 см 20 см 25 см 30 см |
| Арматурная сетка: | Да Нет |
(если Вы выбираете «Без утеплителя» или «Пенофол 10 мм» — следует выбрать Арматурную сетку) |
Без утеплителя Пенофол 10 мм Пенополистирол 20 мм Пенополистирол 30 мм Пенополистирол 50 мм |
| Запитка системы: (то к чему будет подключен водяной теплый пол) |
Без подключения Отопительный котел Система центрального отопления или полотенцесушитель |
Расчитать смету | |
| Расчитать материалы | |
Расход трубы для теплого пола на 1м2
Этапы расчёта теплового пола
После определения формы контура производится вычисление размеров трубопровода в соответствии со строительными нормами и правилами. Расчет трубы для теплого пола зависит от материала изделия. О том, какие расчеты необходимо произвести перед укладкой водяного отопления, смотрите в этом видео:
https://youtube.com/watch?v=tqmDowcXyOg
Применяются такие материалы, как нержавейка, медь, полиэтилен, пенопропилен и металлопластиковые изделия. Каждый материал обладает своим коэффициентом теплопроводности. В зависимости от теплоотдачи материала можно подобрать оптимальный шаг и рассчитать длину.
Объем жидкости, заполняющий отопительную систему — важный показатель
Расчет теплых водяных полов продолжается вычислением объёма жидкости, которой необходимо заполнить систему. Этот показатель напрямую зависит от диаметра и длины трубопровода. Скорость циркуляции жидкости в системе определяется с учётом параметров трубопровода, таких как внутренний диаметр трубки и давление, на которое она рассчитана.
На основании собранных данных определяется мощность водяного теплого пола. Этот показатель позволяет подобрать оборудование для поддержания температуры и давления в системе.
В частных домах можно использовать тепловой насос. При его применении не потребуется дымоход, система будет работать без подключения к вентиляционной шахте.
В другом случае можно подключить подогреватель пола к отопительной системе. В квартирах оптимальным вариантом будет использование небольшого электрического нагревателя. Подробнее об устройстве нагревающихся полов смотрите в этом полезном видео:
Безусловно, тёплые полы повысят общий уровень комфорта. Также результат этой работы повлияет на привлекательность недвижимости в случае продажи. Энергоэффективность подобных систем позволяет экономить на отоплении, поддерживая комфортный уровень температуры в осенний, зимний и весенний периоды.
Тонкости расчета
В большинстве случаев, на 1 м2 расходуются 5 м трубы. При этом длина шага равна 20 см.
Однако укладывать трубы специалисты рекомендуют исходя из точных вычислений. Для этой цели потребуется формула L=S/N*1,1, где:
- S представляет площадь участка;
- N обозначает шаг укладки;
- 1,1 – запасная труба, необходимая для создания поворотов.
Если прибавить расстояние от коллектора до пола, увеличенное в два раза, получится более точный расчет. Для большего понимания вычислений можно привести
Cover_print_c корешком
%PDF-1.7 % 69 0 obj > stream Adobe Illustrator CC 2017 (Windows) 2020-01-13T13:37:35+03:00 2020-01-13T13:37:34+04:00 2020-01-13T13:37:35+03:00 application/pdf

Водонагреватели 1 415 просмотров
Существуют несколько признаков прямо указывающих, что пора почистить газовую колонку от накипи и сажи.
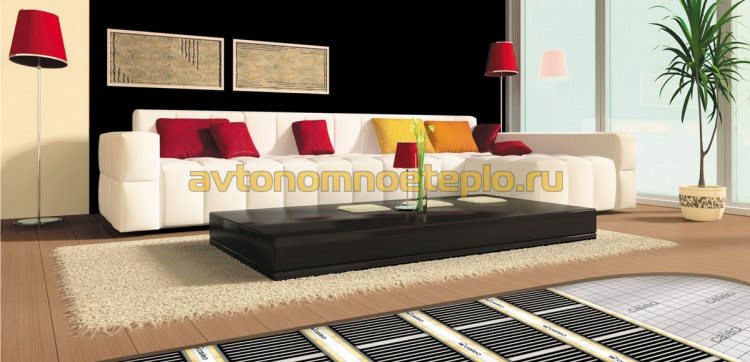
Теплые полы 266 просмотров
Теплые электрические полы пользуются популярностью благодаря удобству эксплуатации, высокой экономичности и эффективности. На сегодняшний
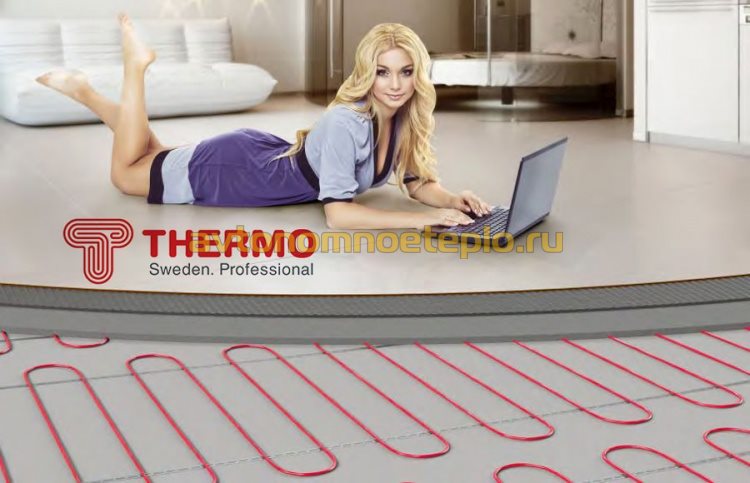
Теплые полы 191 просмотров
Уникальные сверхтонкие теплые полы ThermoMat предназначены для укладки в слой плиточного клея без заливки

Отопительные котлы 272 просмотров
Среди производителей твердотопливного отопительного оборудования, компания Kiturami занимает лидирующие позиции. Водогрейные агрегаты, выпускаемые производителем
Печи и камины 1 522 просмотров
Температура горения внутри топочной камеры при сжигании дров, достигает 1000-1200°С. При принятии решения относительно

Паровые и водогрейные промышленные электрокотлы большой мощности, предназначены для обогрева и горячего водоснабжения производственных
90000 Is it possible to lay Infrared warm floor under the parquet or floorboard 90001 90002 One of the most important issues — is heating the house, and it should be taken very seriously. It is due to the equipped right heating system will depend on the comfort of the room. And one of the most effective options is the arrangement of floor heating. And its installation may differ depending on the topcoat. Because choosing as coating parquet, you need to know, How is the underfloor heating installation under parquet, which system to choose and what to consider.90003 90004 90005 Which to choose a warm floor 90006 90007 90002 Outset, that the words (parquet) means the panel board floating board. At all, better use of laminated wood and not feel the strength to temperature. 90004 90010 90002 Natural flooring does not like humidity drops (maintaining optimum moisture 40-60%) and to heat is not recommended thereby dry tree. 90004 90002 To a parquet floorboard or not periodically appear slit, heating the board to be weak. Parquet boards should not be heated over 26 ºC.Manufacturers of solid parquet and floorboard claim, in order to avoid deformation of the wood and to maintain its service life in a room temperature difference between the coating and air should not exceed 2 ºC. 90004 90002 the norm +18 ºC for premises, the floor can not be heated over 20 ºC. At this temperature, the floors will not feel cold, for them it will be possible to walk barefoot. But the heat they generate is not enough, to warm the room during the cold season. And possible consequences of placing a warm floor under the floorboard.90004 90002 90018 90019 90004 90002 Video: 90004 90002 The first question, which need to be addressed, This choice of floor heating under a parquet. The most commonly used power options, which are divided into three types: 90004 90025 90026 cable floor, which is installed in the upper tie (usually used for tiling). 90027 90026 Reinforced cable floor, settling a tie. 90027 90026 And film floor, which is placed directly under the floor covering. 90027 90032 90002 90034 90004 90002 In the case of parquet, if you do not need to replace ties frequently finds its application film floor, or as it is also called, infrared.But in its application, should take into account some factors, that affect the choice of flooring and: 90004 90025 90026 choosing parquet, you first need to pay attention to the resistance of wood to changes in temperature and humidity, from which it is made. 90027 90026 An unsuitable parquet, during operation may cause cracks. 90027 90026 For persistent species include oak wood, Duss, merbau. 90027 90026 Also, do not stack too thick parquet. Because of this increased demand for a much larger heating installation and higher power underfloor.90027 90026 Provide advance, that heating power per square meter was not more 100 W. 90027 90026 Before laying the parquet humidity should be minimal. Somewhere around 5%. If necessary produce drying. 90027 90026 The room temperature must be equal to the temperature of parquet. To do this, it needs to be pre-positioned in the room, without removing from the package. 90027 90026 Humidity of the premises, which is produced stowage, It should be about 50%. 90027 90032 90002 With a choice of main type of floor heating sorted, but it is necessary to take into account the, that infrared floor is divided further into several varieties.90004 90005 Types and Advantages of floor heating under a parquet 90006 90002 note, that a couple of years ago, the existence of the infrared floor knew not many, and today he reaches the peak of its popularity. And because there are more and new types of, today shared by only two types: 90004 90025 90026 carbonaceous, which is a member rezistovy, the production is carried out from a number of thermal elements, parallel connections of, and Mylar. 90027 90026 Bimetallic, which is an alloy of copper and aluminum, coating a polyurethane film.90027 90032 90002 90069 90004 90002 It should be noted that such systems are used for both sexes, and for walls and ceilings, since they possess a number of advantages: 90004 90025 90026 easy to install, a total work takes up to two hours. 90027 90026 The material thickness of the entire 3 millimeter. 90027 90026 It has a high level of reliability. 90027 90026 It does not require a tie and everything is laid directly under the finish flooring. 90027 90026 a little more economical, compared to other types of.90027 90026 Easily dismantled and installed again. 90027 90026 Ionizes the air space. 90027 90026 It has good elasticity. 90027 90032 90005 Necessary materials for work 90006 90002 Basically, all the necessary materials are included with the film, and that: 90004 90025 90026 Immediately she thermo (sold in rolls). 90027 90026 Insulation kit and clamps. 90027 90026 wire. 90027 90026 thermoregulator. 90027 90026 temperature sensor. 90027 90032 90002 Also, further recommended buy: 90004 90025 90026 Plastic film or rolled waterproofing material.90027 90026 masking tape (desirable bilateral). 90027 90026 heat reflective material. 90027 90032 90002 As you can see, materials is sufficiently small. but important choose the right foil substrate. 90004 90002 It is also worth pay attention to the instrument, which is also a bit: 90004 90025 90026 Scissors. 90027 90026 Pliers. 90027 90026 building a knife. 90027 90026 drill. 90027 90026 Pencil, roulette and ruler. 90027 90032 90005 Substrate preparation 90006 90002 Before, how to begin to lay a parquet floor heating, necessary to conduct training base.It involves the following processes: 90004 90025 90026 Dismantling of old coatings and garbage collection. 90027 90026 Leveling the floor if necessary. 90027 90026 Marking places of wiring and installing thermostat. 90027 90032 90002 90146 90004 90002 After performing these processes, you can proceed directly to the installation of the floor, the process is divided into several stages, namely: 90004 90025 90026 insulation improvement 90027 90026 Preparation of the site for the temperature controller.90027 90026 Laying film. 90027 90026 Insulation cut portions. 90027 90026 Wiring and system test. 90027 90026 And in the end, laying laminate. 90027 90032 90002 Now let us consider more in detail each step. 90004 90005 Arrangement of the insulating material 90006 90002 Firstly, after aligning the sex carried waterproofing device, to avoid exposure to moisture from the lower tier floor. To learn how to perform the waterproofing in a separate article. 90004 90002 Next, you need to provide thermal insulation, which will prevent heat loss.Because it is desirable to choose the reflective material. This will significantly reduce energy costs, at the same time increase the heating efficiency. 90004 90002 You can use almost any material, it is desirable to roll, It needs to be laid up metallized side. Considering Expert opinion on the choice of substrate, It becomes the best one special polyethylene foam (izolon) thickness from 2 millimeters. 90173 90004 90002 Besides, You can also use non-reflective and insulation, eg, cork fabric.Such will be slightly less effective, but cheaper. 90004 90002 The only thing, not recommended to use insulation on the basis of the foil, because they are highly inefficient in this case ,. 90004 90002 when installing, joints are recommended to seal metallized tape. 90004 90005 Construction of room for the thermostat 90006 90002 The next stage is the preparation of the site, where the thermostat floor heating will be installed, performs the following functions: 90004 90025 90026 temperature level of control and customization.90027 90026 Programming ON and OFF. 90027 90026 Setting the temperature and heating support. 90027 90032 90002 As to the place, we decided on a further phase of preparation covering, it is now necessary to make a recess in the wall to install the regulator, and to bring to it for further wiring connection. 90004 90002 Next, prepare the laying scheme and placement of the floor wire. 90004 90005 Laying film 90006 90002 Now it’s time for direct laying of floor heating under a parquet.Yourself installation is carried out strictly according to a prearranged scheme. Below you can see an example of such a scheme, or even take it on board: 90200 90004 90002 As mentioned, styling is carried out only on the desired area of the room, there, where there is no furniture. note, that directly arrangement of floor heating can be performed in two variations: 90004 90025 90026 Bet on 5% space for supplementary heating, in the event of primary source. 90027 90026 On 80% area, if it is planned to use the film as a main floor heater.90027 90032 90002 We consider the second option of laying, when it comes to the full heating. Work is carried out as follows :: 90004 90025 90026 Pre decompose film (for convenience can be cut in the planned areas (it is important to cut only the white bands between the heating sections). The length of the audio band should not exceed 8 m. 90214 90027 90026 An important factor is the offset from the wall not less than 20 centimeters, in the presence of heaters, from them you need to retreat at least a meter.90027 90026 after layout, marks the spot, where there will be connections, and otcherchivaem wiring path. 90027 90026 After applying marks Equips recess, and for wiring temperature sensors. 90027 90026 Next film laid, Enhanced down, joints are held together by duct tape. Not in any way, must not, to the heating zones were adjusted at each other. 90223 90027 90032 90005 Insulation film sites 90006 90002 Further, to avoid possible short circuits and damage to the system, must be insulated space, incision was performed in which.90004 90002 For these purposes, used asphalt mastic, or tape based on bitumen. The process is carried out as follows :: 90004 90025 90026 Cut the piece of insulation required rectangular shape. 90027 90026 the segment size should be slightly larger, than be insulated zone. 90027 90026 In the film itself Do the small opening, which will serve for fixing, by pressing a heater. 90027 90026 isolate, and fix, then, seal the top with tape. 90027 90032 90002 It is worth noting, that place, which will connect wiring, at this stage, we are leaving open, because it will have to install the clamps and wires.90004 90005 Wiring and its testing 90006 90002 Now you need to connect the system to the power supply, and test performance. Let us consider separately the two processes. 90004 90248 system connection 90249 90002 for system connection work is carried out as follows :: 90004 90025 90026 Pre-made recess in the insulation, which will be installed wires. From the center of the wire must go to the plinth, and then displayed to the controller. 90027 90026 The important factor is to provide complete immersion in the wire insulation, to avoid pressure on the wiring flooring.Otherwise, within a fairly short period of posting will be destroyed, and the work will have to redo. 90027 90026 Besides, It increases the risk of circuit, it can and does spoil the whole system and create a fire hazard. 90027 90026 The wires are laid along the channels, and subsequently fixed with tape. 90027 90026 Further, the film clamps are connected. They are inserted between the film and the copper conductor. It is not recommended to clamp them directly to the wiring, because there is a great risk of damaging the film itself.90027 90026 Further, from the end of the wire insulation is removed, it is fed to the terminal, and inserted into it, pressing pliers. 90027 90026 Connection is carried out in parallel, used for this purpose two separate wires. It is recommended to take a cable of different colors, not to be confused. 90027 90026 Thus, one connected from the right side of the film, the second on the left. 90027 90026 Next, place is isolated compound, and secured with adhesive tape. 90270 90027 90032 90248 connect the thermostat 90249 90002 The next step is to connect the thermostat.90004 90025 90026 First of all the temperature sensor is connected to the film, placing at the center section. It is a miniature thermometer, that will send reports on the state of the system temperature to the thermostat. 90027 90026 As I mentioned earlier, it is necessary to prepare a hole, which drown, that he also, as the wires are located above the level of insulation .. If necessary, bend the wire, should prepare canals with smooth turn, the cable did not break down over time ,. 90027 90032 90002 Immediately after arrangement of the sensor, you must start the connection of the thermostat: 90004 90025 90026 It is recommended to install the controller permanently, connected directly to the power supply, but allowed the use of sockets.90027 90026 Summing wiring prepared to deepen in the wall, two wires connected to the main controller contacts. 90027 90026 For the second pair of contact wires summing the film. Grounding terminal interconnectable, but it does not connect to the controller. 90291 90027 90026 Next, fix the controller in the niche, after the test can be carried out with a mixture of glue fixing or gemetikom. 90027 90032 90248 system test 90249 90002 The final step, which is performed before the start of laying a floor covering, It becomes warm floor system test.For this: 90004 90025 90026 include it, setting a temperature in 30 degrees. 90027 90026 Carefully examine the cover. It should be completely absent any sparks. 90027 90026 Also check the level of heating, it should be the same at all sites. Testing is performed using a special tester. 90027 90026 If the defects were not detected, It means the system is normal, and the installation was successful. 90027 90032 90002 After successful testing, necessary to cover the entire surface with plastic wrap, which will act as a waterproofing, and in addition will reduce the wear and tear of heating elements.You can also use rolled waterproofing material, which will provide additional insulation and. 90004 90002 The installation of floor heating under a parquet completed, and you can start laying the coating itself, but there are a number of factors, which should take into account. 90004 90005 Things to know when laying parquet on floor heating? 90006 90025 90026 When laying need to work as carefully, so as not to damage the film underfloor heating. 90027 90026 Before selecting the cover consult with a specialist.90027 90026 Also, be sure to check with the, how to lay parquet on floor heating. 90027 90026 After completion of the laying, In no case can not immediately turn on the system, you must give the floor to reach room temperature, and only after that connect the floor to the network. 90027 90026 Be sure to leave a small gap between the laminate and the walls, which will ensure the ventilation system. 90326 90027 90032 90005 Instructions for laying of floor heating 90006 90002 When working with such a system, as an infrared heat-insulated floor, should take into account a number of factors, which are undoubtedly important: 90004 90025 90026 Any installation work can carry only positive temperatures, wherein the air humidity should be more than 60%.90027 90026 Before connecting the film to the network, must be carefully, preferably several times, check out all the places of isolation and contact zones cutting the integrity and tightness. 90027 90026 In no case can not be connected to the network film rolled up, or in the case of, when the strips lie on each other. 90027 90026 If the damage zone of the film with a graphite filler, you must immediately insulate the surface on both sides. 90027 90026 The system can not be installed on damp substrates.90027 90026 When, if there was a water leak (flooding) underfloor heating, you should immediately turn it off, disconnected from the mains and allow to dry naturally. 90027 90026 At the end of the work sketch a layout of all the wires and strips of film, as it has been shown in practice, such a move is very important and useful in the future. 90027 90026 According to the laid warm floor can not walk in shoes. 90027 90026 Set the temperature sensor at the strip, in any case it does not brick, it must be on the edge, so you can easily replace if necessary.90027 90032 90005 conclusion 90006 90002 Now you know, independently arrange a warm floor under the parquet. In fact, the process is quite simple and fast, important to approach it with the utmost care. In conclusion, Here you can find video instructions for installing infrared floor. 90004 90002 90358 90019 90004 90002 Video: 90004 90002 90364 90019 90004 90002 Video: 90004 90002 90370 90019 90004 90002 Video: 90004 90002 90376 90019 90004 90002 Video: 90004 90002 90382 90019 90004 90002 Video: 90004 90002 90388 90019 90004 90002 90392 90019 90004 .90000 Laying of warm water under floor tiles 90001 90002 Mainly for private home use system underfloor heating water type. Also often as flooring tiles is chosen. It creates a beautiful appearance, but it has an excellent thermal conductivity. Tiled floor in such a case requires careful heating, with which easily copes floor heating. Average heating radiator can not transfer as much heat on the base, so it was comfortable for walking. Heated floor tiles and very well with each other. There are different water-floor installation system.90003 90004 Mounting options for floor heating 90005 90002 Initially, it is worth thinking about, how best to make laying of floor heating, what option to choose this. Pavement can be made with a floor screed, grazing method (without concrete screed), as well as the wooden sleepers (Installation is carried on top of the lag). Each of them has its own peculiarities and subtleties in the work. 90003 90002 Concrete ties will need to purchase a specific set of materials for work. All that will have to be in the future — to carry out the construction of the water pouring warm floor under the tile grout.In this case, everything must fit technology. In the presence of defects or voids in the base, We have to do all the work again. When I laid screed, it takes time to complete drying. Only after this can be done tile laying on the tile adhesive. To heat is evenly distributed across the surface of the floor, the thickness of the adhesive layer itself and tiles should be smooth. 90003 90002 The method of grazing used polystyrene plates, having an aluminum plate with grooves, in that and put pipeline selected mounting step.The costs in such a case as low, and the very process of laying hot water under the floor tile does not take much time. If it will be necessary to produce the clutch cover, then as a basis is best to use water-resistant material, such as sheets gipsovolokonnyh. Polystyrene is more suitable for laminate or parquet. 90003 90002 For wooden houses are in demand floor heating device on logs. There also are two more subspecies — rack or modular. When the installation is made fully, on top of the whole structure of the stacked sheets gipsovolokna, then given the opportunity to carry out laying tile.90003 90004 Substrate preparation 90005 90002 When the hands have the necessary amount of material for, especially components warm water floor, it is possible to start preparations. The surface must be free of foreign objects, trash, dust etc .. each stage fill screed under floor heating and it, It requires strict adherence to technology. Each stage should provide a perfectly flat surface. 90003 90002 The process of filling It will depend on the choice of. When choosing a floor heating water, which one is better able to consult experts in this field of construction.In addition, they will be able to tell the sequence of all the works, even in the preparatory phase. 90003 90004 Installing the collector group 90005 90002 In addition, to be distributed all components warm water floor. Start talking with the installation of the collector in the collector cabinet. The cabinet can be located anywhere, which will be more user-friendly. Yet it is attached to the wall, vertically so, that was above the heating surface level. It will be possible to connect several circuits, if it is needed.Most often, this is done in the presence of a large area of the room. Everything heating tubes connected to the main source of, and made the installation of devices for temperature and pressure control modes. Here, the circulation pump is located, enabling constant flow temperature of the floor heating circuit. 90003 90002 The system can be switched off completely by means of specially installed valves. To this valve itself and attached manifold. 90003 90004 And hydro insulation base 90005 90002 Under Warm water floor, which will in the future to lay tiles, It should be arranged qualitative heat and waterproofing.Ideally suited for waterproofing sheets of aluminum foil or polyethylene film. Foam insulation may be, on one side of which is fixed a film of aluminum. by the way, the latter material will be sufficient to perform both functions of the base under floor heating. It is worth noting, it is better to warm water floor, than the radiator battery. He could not spoil the aesthetic appearance, and create a comfortable environment. 90003 90002 We must not forget here about the damping tape, which in the finished product can be purchased at hardware store.It should be mounted on the wall around the perimeter of the room at the level of the future pouring concrete screed. The thickness is usually taken in 5-8 mm, and height — up to 15 cm. You can not be afraid to fix it more and more. Subsequently, all very easy to cut with a knife. With self-manufacturing of belt is best to attach it to the wall with screws for reliability. This all is done for the reason, that heating 90031 concrete has a property to expand by about 0.5 mm for every meter of surface.90032 90003 90004 Fixing the heating circuits 90005 90002 Insulation is best to buy a special floor for warm water. This is due to the fact, that it has the appropriate slots, in which the attachment pipeline. But it is very important to purchase the correct version for your device tubes heated floor. In the market represented a huge range of. Additionally reinforced plastic, There are also copper and stainless steel. Yet more interest and popularity has material XLPE, with sufficient set of positive features and operational characteristics.90003 90002 When such grooves are not available, the reinforcing layer is arranged, which pipes are fixed and the entire system. Additional reinforcement layer may be arranged on top and the tubes. In this case, the reliability of the entire structure significantly increases. 90003 90002 There are other options to mount the pipe filled with concrete screed. This is a different fasteners in the form of collars, latches. In any case it is necessary to adhere to installation technology, where indicated, what tubes They must be located no closer 10-15 cm from the wall in the room.Besides the standard step is selected 10-12 cm. loop length should not exceed 10 cm. 90003 Important observance screed thickness over pipes. The lower layer of the floor quickly warms 90002 An important stage — selection of a particular scheme, allowing the pipeline to perform fastening on the subfloor. This can be not only purely «snake» or «snail», but combined, When combining both options in the same room. In the latter case, all is done to improve the quality and efficiency of the entire floor heating system.Since the «snake» does not possess all the good qualities of the presence of floor heating only coolant exit area, the experts recommend arrange a double «snake». All this has to be previously displayed at the circuit diagram, to subsequently been easier to carry out its connection to the collector. In addition, this option will allow the correct and accurate estimates of the number of components underfloor heating. For a more accurate calculation of Use calculator warm water floor. 90003 90002 90003 90004 testing the system 90005 90002 If the system is designed, before pouring the concrete screed, it must be checked for serviceability and tightness of all connections.crimping occurs (pressure test). This step will allow to detect all defects installation of warm water floor, that could subsequently occur after flooring tiles. 90003 90002 The entire system must be filled with water and pressurized, which is about half of the more than, than the normal operating pressure. You can additionally be used for best results an air compressor. All carried out for at least days. the main thing, that nothing be manifested. Better to wait an extra day, but be sure, everything works debugged.Otherwise, when it meet the surface of the tiles, will have to make its dismantling and removal of the screed to the hospitality area, to repair. But alone it will be difficult to eliminate all without extra costs. 90003 90004 screed 90005 90002 Tile importantly qualitatively arrange concrete floor. Usually it is the height 30-60 mm. It is worth remembering, that the floor covering can be laid only after about 1 months after the grout. During this time it occurs drying and setting of cement.In some cases, produce measures to accelerate the drying process. To do this, turn on the heater in the room, but the temperature should not be more 90031 25-30 90032 degrees. Otherwise, an uneven surface drying and drying. But the best option in this case — a natural drying, when there is extra care screed. Better to wait an extra week and not have to worry about the quality. 90003 90002 Reduce the time of work on top of the floor screed underfloor heating for laying tiles allow self-leveling mixture.It will be ready after only 10 days after installation. More precise time-frame prescribed by the manufacturer on the packaging, and what should be consulted prior to the works. 90003 90004 Laying tiles 90005 90002 No special conditions for, to implement tile laying Heated floor in water. There correspond to any other surfaces. It is important to include the right underfloor heating after installation and during operation to monitor the temperature regime. 90003 90002 As binder used a special tile adhesive for floor heating.He should be able to use the system underfloor heating. Typical embodiments of adhesive can not withstand the constant temperature changes especially at coolant temperatures uncontrollable. 90003 90002 Gluing is done with a notched trowel. The height of the teeth depends on the layer of the connecting element and floor tiles. Once the adhesive is applied to the back of the tile, it should be pressed to the floor and a little squeeze, by holding for a while. Do not be amiss on a horizontal surface using a spirit level.In some cases you will have to press one side closer to the bottom, to squeeze out excess glue. 90003 90002 For flatness seams special crosses between the tiles used elements, which may be of different widths. They are installed after laying tile on the floor warm water in the corners. Later they removed, and upon drying the adhesive is performed grouting. The adhesive can dry for even two days. All this is also spelled out in the recommendations of the manufacturer. 90003 90002 In the process tile flooring at the base of the concrete screed for warm floor, the whole system must not be in working order.Everything shuts down before the end of work. It turns on the warm floor after laying the tiles and complete drying glue. When produced grouting, It begins full operation and floor heating in the room. 90003 90004 cost of 90005 90002 As for the cost, not only the system of warm water floor, but the tiles, laid on the surface, then everything will depend on certain factors: 90003 90076 90077 Purchased fitting material, manufacturer, mark, quality. But no one does not recommend to save on such a system ,.After all is done not for a year or two, and for decades to come. Better once to buy all quality, than later to spend money for repairs. 90078 90077 The cost of the collector group. More expensive versions of products have the ability to automatically adjust the temperature level in the room and the pressure in the circuit. 90078 90077 on the device concrete screed works, complete align all surfaces. 90078 90077 Installation of floor heating, which is often carried out Specialized teams. 90078 90085 90002 Averages prices per square meter of warm water floor is 1500-3000 rubles.This includes material already and all installation work. If the work will be carried out not only in one room, and in the house with a large area, the cost of the work will be slightly reduced. The total cost should be calculated individually. Favorable warm floor will turn out at independent performance of the entire process from start to finish. But for this purpose the necessary amount of experience and knowledge. 90003 90002 Flooring tile as, as well as directly the radiant floor heating excellent interact.It delivers high-quality heating material, and tile itself is great for walking on it barefoot. 90003 90002 90091 90092 90003 90002 Video: 90003 90002 90097 90092 90003 90002 Video: 90003 90002 90103 90092 90003 90002 Video: 90003 90002 90109 90092 90003 90002 Video: 90003 .90000 Laminate flooring. The calculation of the number of planks 90001 90002 User Evgeny asked me to make / 700 /, particularly, I quote, «for laminate — with the known size of one plank and area of a room calculate the amount including the scraps» 90003 Since I had already laid laminate twice :), the task was quite clear, and the calculator was created. A picture is worth a thousand words, so I’ve created one on the left. It actually depicts the method of laying, on which the calculations are based.90004 90002 Now about the calculator: 90003 90007 Input data: 90008 the length and width of the room in meters, the length and width of the laminated plank in millimeters, the number of planks per pack, and how we lay the board (by length or by width of the room) 90004 90002 90007 Output data: 90008 90003 90007 Room area 90008 — that’s simple, just for reference 90003 90007 Number of planks used entirely 90008 — number of greens + yellow plank (in fact, it haи to be added the number of scraps or to the number of whole planks — I’ve decided to add them to the number of whole planks because the part shown in the picture below does not require lengthwise sawing.90003 90007 Length of the last plank, millimeters 90008 — length of the yellow plank shown below 90003 90023 `Number of scraps 90024 — number of blue planks 90003 90007 Scrap width, millimeters 90008 — width of the blue scraps 90003 90007 Total number of planks used 90008 — number of green planks + yellow plaml + number of blue planks 90003 90023 `Number of packages 90024 — as the laminate flooring is selling in packages — necessary amount of packages 90003 90007 Number of unused planks 90008 — and that’s the number of unused planks from the last package 90004 90038 90039 Laminate flooring.The calculation of the number of planks 90040 Calculation precision 90002 Digits after the decimal point: 3 90004 90002 Room area, square meters 90004 90002 90004 90002 Number of planks used entirely 90004 90002 90004 90002 Length of the last plank, millimeters 90004 90002 90004 90002 Scrap width, millimeters 90004 90002 90004 90002 Total number of planks used 90004 90002 90004 90002 Number of unused planks 90004 90002 90004 90002 90068 save 90069 Save 90068 extension 90069 Widget 90004 .90000 Cement screed floor: the appointment, laying, calculation of components 90001 90002 And the premises belonging to the old housing stock, and completely new, recently commissioned apartments rarely can boast a flat floor. Accordingly, the issue of updating and improving the quality of the floor is quite relevant for both residential and industrial facilities. To tie up the floor of the room helps screed. It can be of different types, knowing the features of which you can choose the technology that is ideally suited in a particular case.90003 90002 Content: 90003 90006 90007 1 Types of screeds and their functions 90008 90007 2 Cement for screed: how to calculate the required quantity? 90008 90007 3 Cement screed: pouring rules 90006 90007 3.1 Basic rules to follow when leveling the floor 90008 90015 90008 90007 4 How to increase the strength of the screed? 90008 90015 90020 Types of screeds and their functions 90021 90002 Any type of floor screed can perform the following functions: 90003 90006 90007 level the surface; 90008 90007 increase the rigidity and strength of structures; 90008 90007 strengthen sound and heat insulation of an apartment, house; 90008 90007 create the required angle of inclination of the surface; 90008 90007 raise the floor level; 90008 90007 distribute the load evenly over the entire surface area.90008 90015 90002 90039 Thus, we can say that the floor screed refers to the technological processes that allow for further finishing finish to achieve a completely flat surface. In the 20th century, only one type of screed was used, which has not lost its relevance so far. However, at present there are completely new types of leveling the floor, differing from one another by styling technology and potentially possible objects on which they can be used. 90003 90002 Modern floor screed happens: 90003 90006 90007 90045 Concrete or cement.90046 As a rule, it is used at primary alignment of a surface. Perfectly eliminates large bumps and floor drops. Laying technology is extremely simple, but requires some physical costs. 90008 90007 90045 Self leveling 90046 Performed by the new technology with the use of special ready-made mixtures. It can be laid under any covering. The thickness of this screed is up to 3 cm. 90008 90007 90045 Dry. 90046 It is used to level small unevenness of the floor with the help of special hard materials.There are two ways to do this tie: 90055 — alignment on logs. It is rather laborious and complicated process, requiring specification and availability of certain knowledge. The surface in this case is leveled with solid sheets of chipboard, plywood or other materials, which are placed on a system of log specially created from wood; 90055 — alignment with gypsum-fiber sheets. It is performed fairly quickly, does not require specific knowledge. However, it should be borne in mind that on such a floor covering loads must be properly distributed.90008 90015 90002 90060 Find out where white cement is used. 90003 90002 Detailed article on the proportions of cement. Proper storage in large volumes http://o-cemente.info/cement/silos-dlya-cementa-vidy-xaraktiristiki.html 90003 90020 Cement for screed: how to calculate the required quantity? 90021 90002 The ratios of sand and cement for floor screed depend on the brand of material used. You can use the following table to calculate proportions: 90003 90068 90069 90070 90071 90072 Brand solution 90073 90074 90071 90072 Proportion 90073 90074 90071 90072 Brand of cement 90073 90074 90083 90070 90071 brand 300 90074 90071 1: 3 90074 90071 cement 600 90074 90083 90070 90071 brand 200 90074 90071 1: 4 90074 90071 cement 600 90074 90083 90070 90071 brand 300 90074 90071 1: 2 90074 90071 cement 500 90074 90083 90070 90071 brand 200 90074 90071 1: 3 90074 90071 cement 500 90074 90083 90070 90071 brand 300 90074 90071 1 : 1 90074 90071 cement 400 90074 90083 90070 90071 brand 200 90074 90071 1: 2 90 074 90071 cement 400 90074 90083 90070 90071 brand 150 90074 90071 1: 3 90074 90071 cement 400 90074 90083 90070 90071 brand 200 90074 90071 1: 1 90 074 90071 cement 300 90074 90083 90070 90071 brand 150 90074 90071 1: 2 90074 90071 cement 3 00 90074 90083 90070 90071 brand 100 90074 90071 1: 3 90074 90071 cement 300 90074 90083 90164 90165 90002 Usually for floor screed held in apartments, a solution of mark 200 or 150 is used.90003 90002 90169 To calculate the specific amount of the required materials is possible by conducting mathematical calculations. For example, in order to pour a 5-cm tie on an area of 40 m2 in size, we first calculate the required number of cubic meters of the mixture: 90003 90002 40 m2x 0.05 m = 2.0 cubic meters of the mixture. 90003 90002 Since the ratio of sand and cement should be about 3 to 1, then sand will need at least one and a half cubes. This is calculated in this way — in two cubic meters of the mixture three parts of sand (or can also be written as a fraction) and one part of cement (1/4): 90003 90002 2.0 (cubic meters) x ¾ (sand) = 1.5 cubic meters. 90003 90002 Cement is required 0.5 m3. This can be calculated using the same formula: 90003 90002 2.0 cubic meters x ¼ (cement) = 0.5 cubic meters. 90055 Now we calculate the specific amount of each material. For this we need the following table: 90003 90068 90069 90070 90071 90072 Material name 90073 90074 90071 90072 Weight 10 L 90073 90074 90071 90072 Weight 1 m3 90073 90074 90083 90070 90071 Cement (loose) 90074 90071 13-14 kg 90074 90071 1300-1400 kg 90074 90083 90070 90071 Crushed stone (gravel) 90074 90071 15-17 kg 90074 90071 1500-1700 kg 90074 90083 90070 90071 Sand 90074 90071 14-16 kg 90074 90071 1400-1600 kg 90074 90083 90164 90165 90002 We consider cement: 0.5 (cubes) x 1300 (1400) kg = 650 (700) kg. 90003 90002 Consider the sand: 1.5 cubes x 1400 (1600) kg = 2100 (2400) kg. 90003 90002 Another very important fact that must be considered in the calculations: in the process of creating a concrete mass, the volume of the mixture is significantly reduced. This happens due to the fact that the smallest particles of the filler fill the voids. Thus, from one cubic meter of dry mix you can get from 0.59 to 0.71 m3 of concrete mass. Accordingly, the preparation of a cubic meter of concrete mass will require much more dry materials.90003 90002 For example, for concrete of the same composition is required: 90055 sand — 0.445 m3, gravel — 0.870, cement — 0.193 m3 (250 kg) and water — 178 l. 90003 90002 For another composition is required: 90055 sand — 0.395 m3, gravel — 0.880, cement — 0.198 m3 (260 kg) and water — 185 l. 90003 90002 For the third composition is required: 90055 sand — 0.445 m3, gravel — 0.880, cement — 0.204 m3 (265 kg) and water — 189 l. 90003 90020 Cement screed: pouring rules 90021 90002 If you are going to level the floor, you should not forget that the screed must meet the following quality indicators: 90003 90243 90007 The finished floor must withstand the required loads.90008 90007 Under the screed must be waterproofing of any kind. 90008 90007 Waterproofing coating must also be applied on the walls — in the height of the planned screed. 90008 90007 The floor is leveled in one day in order not to disturb the density of the working solution. 90008 90007 If it is planned that the screed will mask communications systems, then its height above the pipes should be at least 2 centimeters. 90008 90007 The leveling layer, which is laid on top of the warm floor, should be 5 cm.90008 90256 90002 The criterion of high quality work is the absence of chips and cracks. If the damage is present in large quantities, then leveling the floor will have to be done again. And not too noticeable shortcomings can be perfectly corrected with the help of cement-sand mixture. 90003 90002 For holding the floor screed and working with concrete or cement mortars, you will need tools such as a tape measure, trowel, rule, trowel, level (level), knife, beacons, drill with nozzle (mixes the mixture) and a special container in which the working solution will be prepared.90003 90261 Basic rules to follow when leveling the floor 90262 90006 90007 The screed is done exclusively on a clean basis, so you need to carefully inspect the old screed and assess its condition. If the floor is strong enough and does not crumble, then you can safely pour the cement mortar on top. If the old screed in poor condition, then it is necessary to get rid of it. This can be done using a bump stop or a perforator. After that, it will be necessary to completely remove dirt and dust from the surface.90008 90007 Before pouring it is necessary to check the joints of the floor and walls. If necessary, the joints should be treated with mounting foam — this will prevent leakage of the solution to the neighbors. 90008 90007 Plasticizers can improve the properties of a concrete mortar. These substances to some extent prevent the occurrence of cracks on the already prepared base. 90008 90007 Immediately before applying the solution, the entire base must be moistened with plain water. 90008 90007 Pour ready solution, starting from the far corner of the room.90008 90007 During the alignment, the solution must be shaken, thus removing air bubbles from it. If for some reason it is impossible to shake it, then you can simply pierce the solution in several places with wire. 90008 90007 After laying a cement or concrete screed, it is prohibited to ventilate the room until the solution hardens completely. In order to avoid annoying errors, you should carefully study the instructions on the packaging of cement or the corresponding mixture. 90008 90015 90020 How to increase the strength of the screed? 90021 90002 90282 In order to increase the strength of the floor, when the screed is placed in its body, a metal mesh is embedded in the body, which guarantees the absence of cracks.The solution is most often created from sand-mixed sand concrete. Before mixing the solution you should pay attention to the color of the dry mixture — it should be a uniform gray tint, without yellow, red and brown inclusions, indicating an excess of sand. 90003 90002 Experts advise not to add too much water to the solution — only in this case, the strength of the screed will be quite high. You can also improve the working solution with special additives that increase the plasticity and facilitate the alignment of the screed.90003 90002 When the filling has already been done and its surface is aligned with the beacons, the solution must be allowed to dry (the desired level of humidity is maintained by daily sprinkling with plain water) and remove the beacons. Most often this happens on the second day after pouring. The traces left from the lighthouses, ground and rubbed with fresh solutions. 90003 90002 It is recommended to monitor the condition of the screed for ten days. In this case, the laid surface must be further daily moistened with water, preventing the drying of the concrete and its cracking.90003 .